
Hi all~!
Today I'm here to share my thoughts on some of the gloss I've tried.
Working on some of the sweet deco items, it looks better to have some gloss on. Just like the glaze on some desserts~ It makes it looks more appetizing!
So far I've tried 3 different brands. (From left to right)
-The Americana Triple Thick Gloss Glaze
-Padico Sealer Super Gloss
-Sculpey Satin Glaze

The first one I want to review is the Padico Sealer Super Gloss. I'd like to talk about this one first because this is the BEST one I've tried among these 3.
Padico is a Japanese brand. They have a lot of different type of clays and clay accessories. Here's a review of the Padico molds review I have:
I bought this super gloss online. I don't know if there's any craft store in the US sells this.
The Padico Sealer finish has 2 different types. One is "Super Gloss" and the other one is "Super Matte". It depends on what kind of finishing you'd like to have on your surface.
I got the "Super Gloss", the Sealer logo is in coral red. (which"Super Matte" is in teal blue)
This is a 100ml bottle and it is water based. It can be used on clay, wood, paper, leather, metal and cloth.

Let's take a look at the gloss consistency~
It's kind of watery and comparatively clearer than the other 2 brands. It has a slightly chemical scent in it but it's nothing too bothering I think.
Usually I pour a quarter size out and it's good for a coat of 10 to 15 nickel size of charms that I have.
Like using any type of gloss, it's better to pile thin layers on until you have the results you want. I like to use a flat brush to put thin coats on the clay. This Padico Sealer Super Gloss is so easy to use. When I dip the brush in it, it wouldn't load a whole bunch of product on the brush because it is kind of thin and watery.
When I brush it on my clay charm, I could easily glide onto the clay and didn't feel too streaky or dragging the brush around. It's so easy to TRULY apply a thin coat~
After applying 1 coat, I usually wait 30-45 minutes for it to dry. I would say it's dried after 15-20 minute, but I'd wait longer to make sure it's completely dry.
Please keep in mind that after you apply the gloss and wait for it to dry, you have to clean your brush as soon as you can so the brush wouldn't get hardened~

After 1 coat of gloss, the result is pretty nice but I wouldn't say it's "Super Glossy". If you'd like to get a "Super Gloss" finished, I'd suggest you to put couple more coats on until you feel satisfy.
To me 3-4 coats give me the results that I like. (As shown in the 2 pictures below)
It gives you a very nice shiny finish and yet the gloss or paint has no crack happened.
The only thing that has to be careful is, do not shake the bottle before use or apply too thick layer in 1 coat. It's because I found some bubbles on some of my clay charms. I think it might be caused of the thicker coats I put on when the gloss was starting to dry in the foil container or on the brush. When you find the brush is packing more product on, you can use a damp paper towel to wipe off the excess. It can avoid to brush on too thick of a coat on your clay.

I'd highly recommend this gloss if you'd like to try. It's very easy to use and it's not messy. Moreover, the result is very nice, clear and glossy. However, it costs more than the other 2 brands. The product itself doesn't cost too much but I had to pay for international shipping online, which makes the cost higher.
It's better to do some research before buying it, because different online seller has different selling prices and shipping costs. Some sellers on Etsy carry this product. As long as you do your homework you can find a reasonable deal~

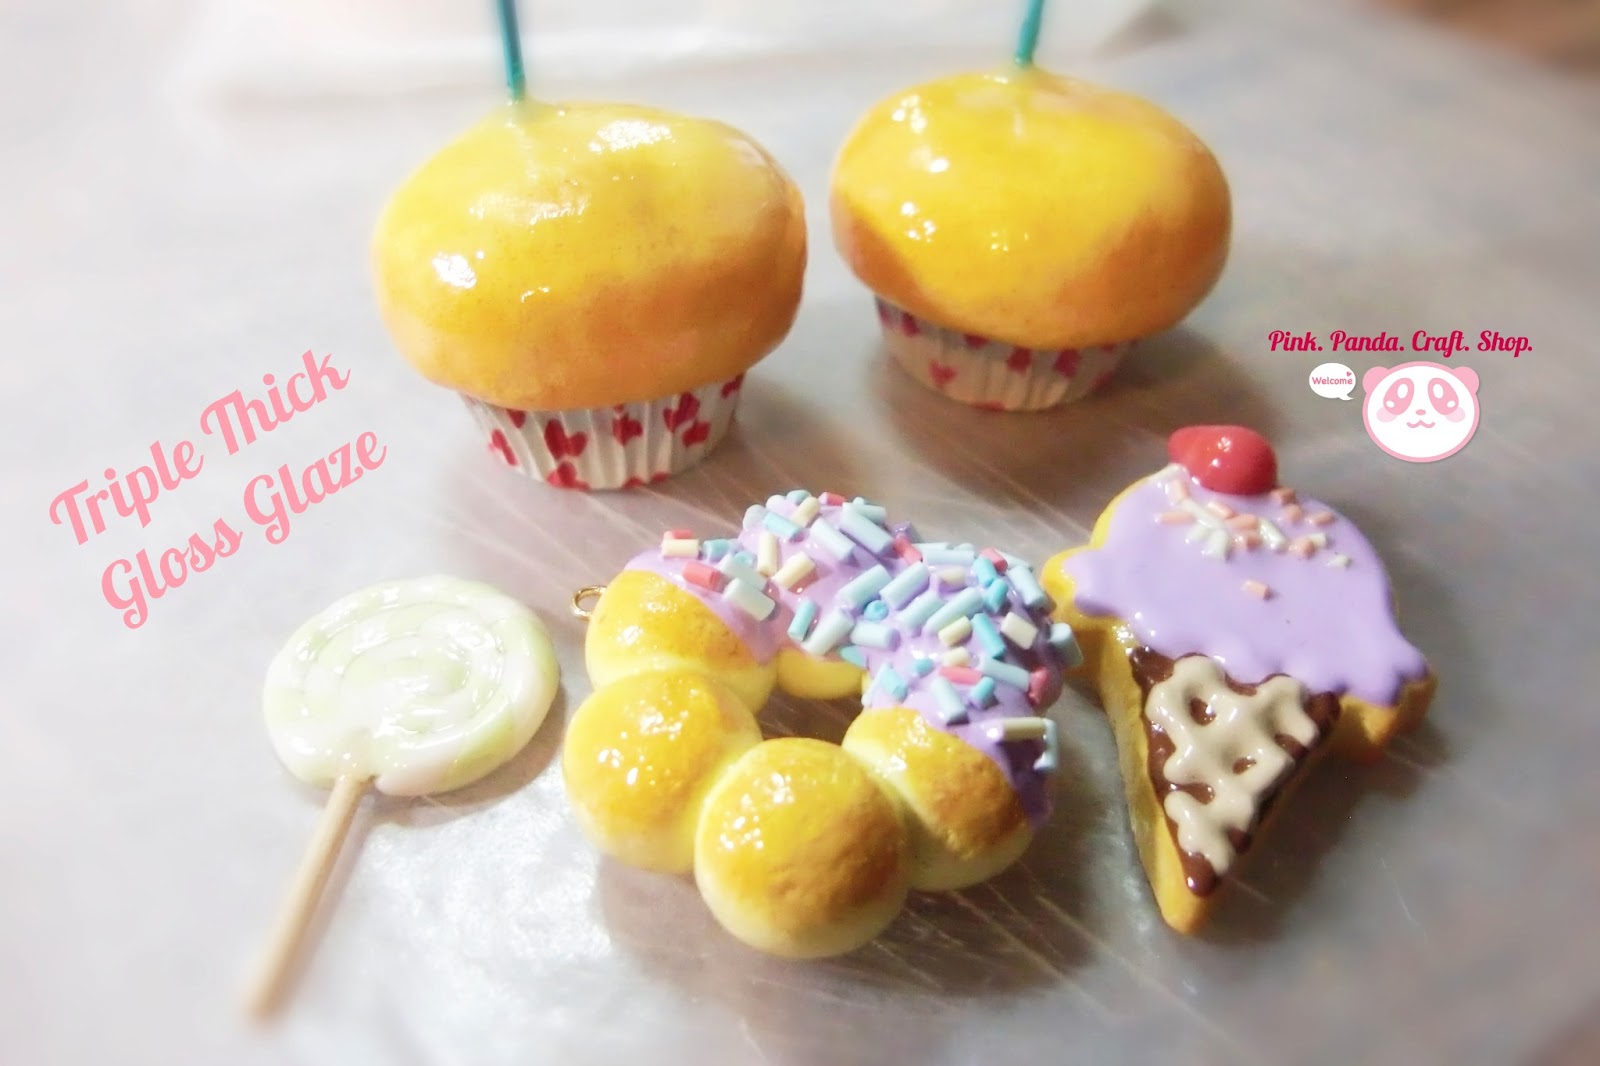
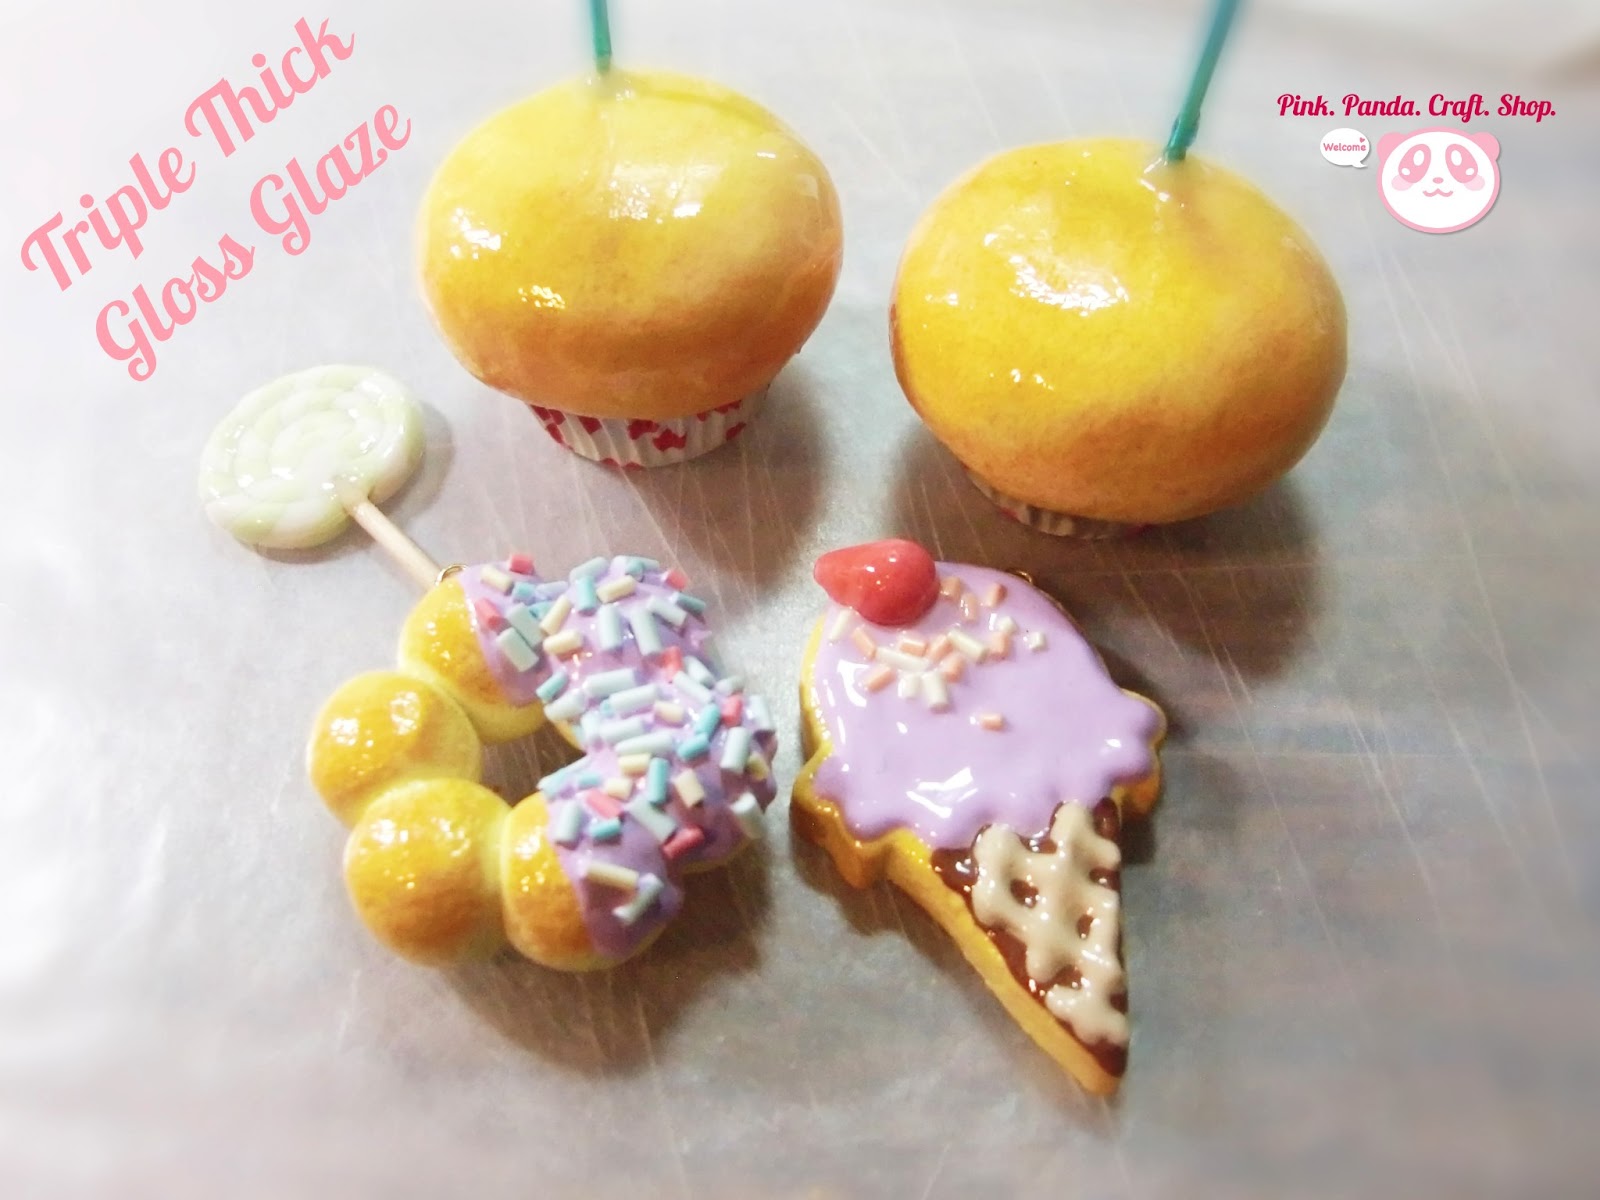
The next one I want to talk about is the Americana Triple Thick Gloss Glaze.
I've been using this one for awhile now and it is good I would say, but it's not great. I'd give it a medium plus rating.
I got the 236ml tall bottle. There's a smaller bottle (59ml) you can choose if you want to try it out. It's very easy to find in the craft stores and the price is reasonable. It usually sits by the acrylic paint section.
It says this glaze may be used on wood, wicker, metal, paper-mache, plaster, resin, bisque, ceramics, painted china and other surfaces.
With this Triple Thick Gloss Glaze, I also use a flat paint brush to apply it on my baked clay. In the picture below, you can see the consistency. It's thicker than the Padico Sealer Super Gloss and it's kind of cloudy.
It also has a chemical scent in it but it's not bothering me either. I use the same amount like how I use the Padico gloss. I just pour it out to a foil container then brush it to the surface I want.

As this has a thicker consistency, I need to work with it faster. I wouldn't recommend you to pour too much out in one time since it gets to dry pretty quick.
To use this gloss, I find it's easier to apply a thick coat (not TOO thick though) instead. If you try to put a thin coat on, it'd be too streaky. Make sure to brush it on evenly. If it gets too thick, it would drip the excess to the bottom and would form a flat piece of dry gloss stuck at the bottom. So please make sure don't put it on too thick.
With this gloss, I didn't find any bubble occurred. Also it gets to dry pretty quick. Usually it takes 15-20 minutes to dry. I'd wait around 30 minutes to apply another coat. I like put 2-3 coats on to get the results I like. It looks cloudy in the bottle but when it's dried, it gives you a clear and shiny finish. (As shown in the 2 pictures below)
This gloss has no problem when I put it on clay surface or sometimes on acrylic paint surface. Why would I say "sometimes"~? You'll see what I mean when you scroll down and see the other 2 pictures below.
Overall, this Triple Thick Gloss Glaze is good. It does a good job most of the time. I'd recommend this to people if they'd like to try.
However, there's one thing as a reminder.
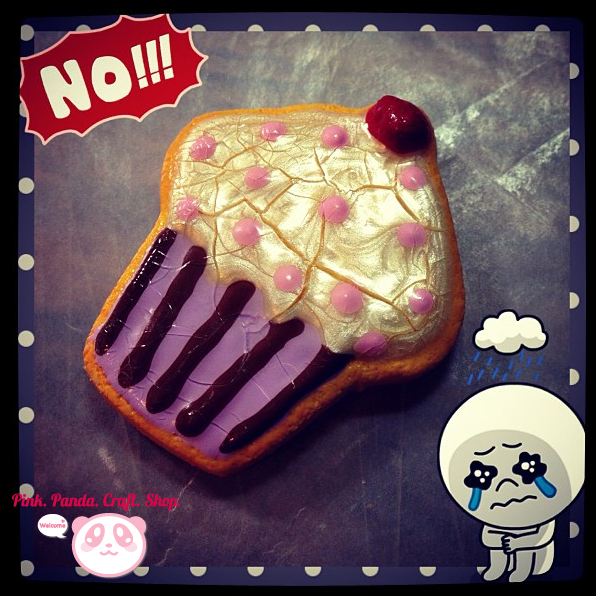
I have experienced some cracking with this gloss. Especially when I put it on top of the acrylic paint. (As shown in the 2 pictures below)
I tried to search on the internet and find out the reason why. There's people says it might be because of the humidity, and some says it might because of the grease on the surface before applying the gloss.
I don't have a control with the humidity in my room lol, so I don't know if this is true or not. For the grease part, I tried to wipe the acrylic paint surface with a damp paper towel and dried it before applying the gloss. However, cracking still happened.
Therefore, I still haven't found any solution to avoid this I'm sorry to say. I'd recommend you to test it out on a corner before applying it all over with acrylic paint on top.
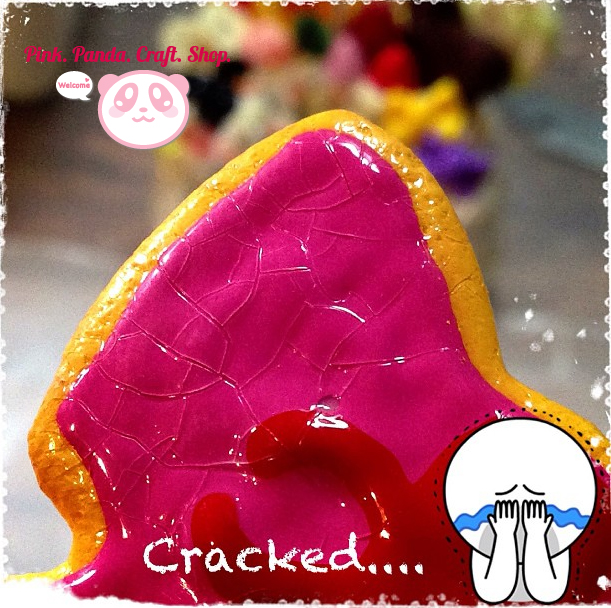
I was really sad when I saw these :(
Putting gloss is usually the last step. If it cracks, it's just kind of like ruined everything.... Also, there's nothing else I could do to fix this. When it happens to me it really gets me down all day....
The last one I want to talk about is the Sulpey Satin Glaze. It's probably because I like this one the least lol.
I got this one when I first started doing polymer clay miniatures. I didn't really know too much about this craft yet. This was the only kind that I found at the craft store and that's why I got it.
It's a 30ml bottle (The smallest one among the 3 that I've tried). I'd suggest you to bring a craft store coupon with you if you want to get this. It makes it more bargain this way.
Other than baked clay, it doesn't say it can be used on other surface. This is very watery with a milky white color. It also has a chemical scent in it but it's nothing bothering.
This glaze does it job pretty good if you like a waxy finish. It takes around 30 minutes to dry. (Just like what it says on the bottle~) Since it has a thinner consistency I thought it would dried a little bit faster. However, this is not the case.
I also use a flat brush to apply it onto the baked clay. It's so thin like brushing water on. It's not streaky or sticky that's for sure. Just load the brush little by little and apply it on. It's easy to use I would say~

I haven't used this glaze too much since I like the glossy finish better. It hasn't cracked on the baked clay I've tried on so far. I also haven't used this on any acrylic paint yet, so I'm not sure if it would crack on paint.
I think this gloss has done a pretty good job. It's a little pricy though. I think the price with a coupon is more reasonable :p
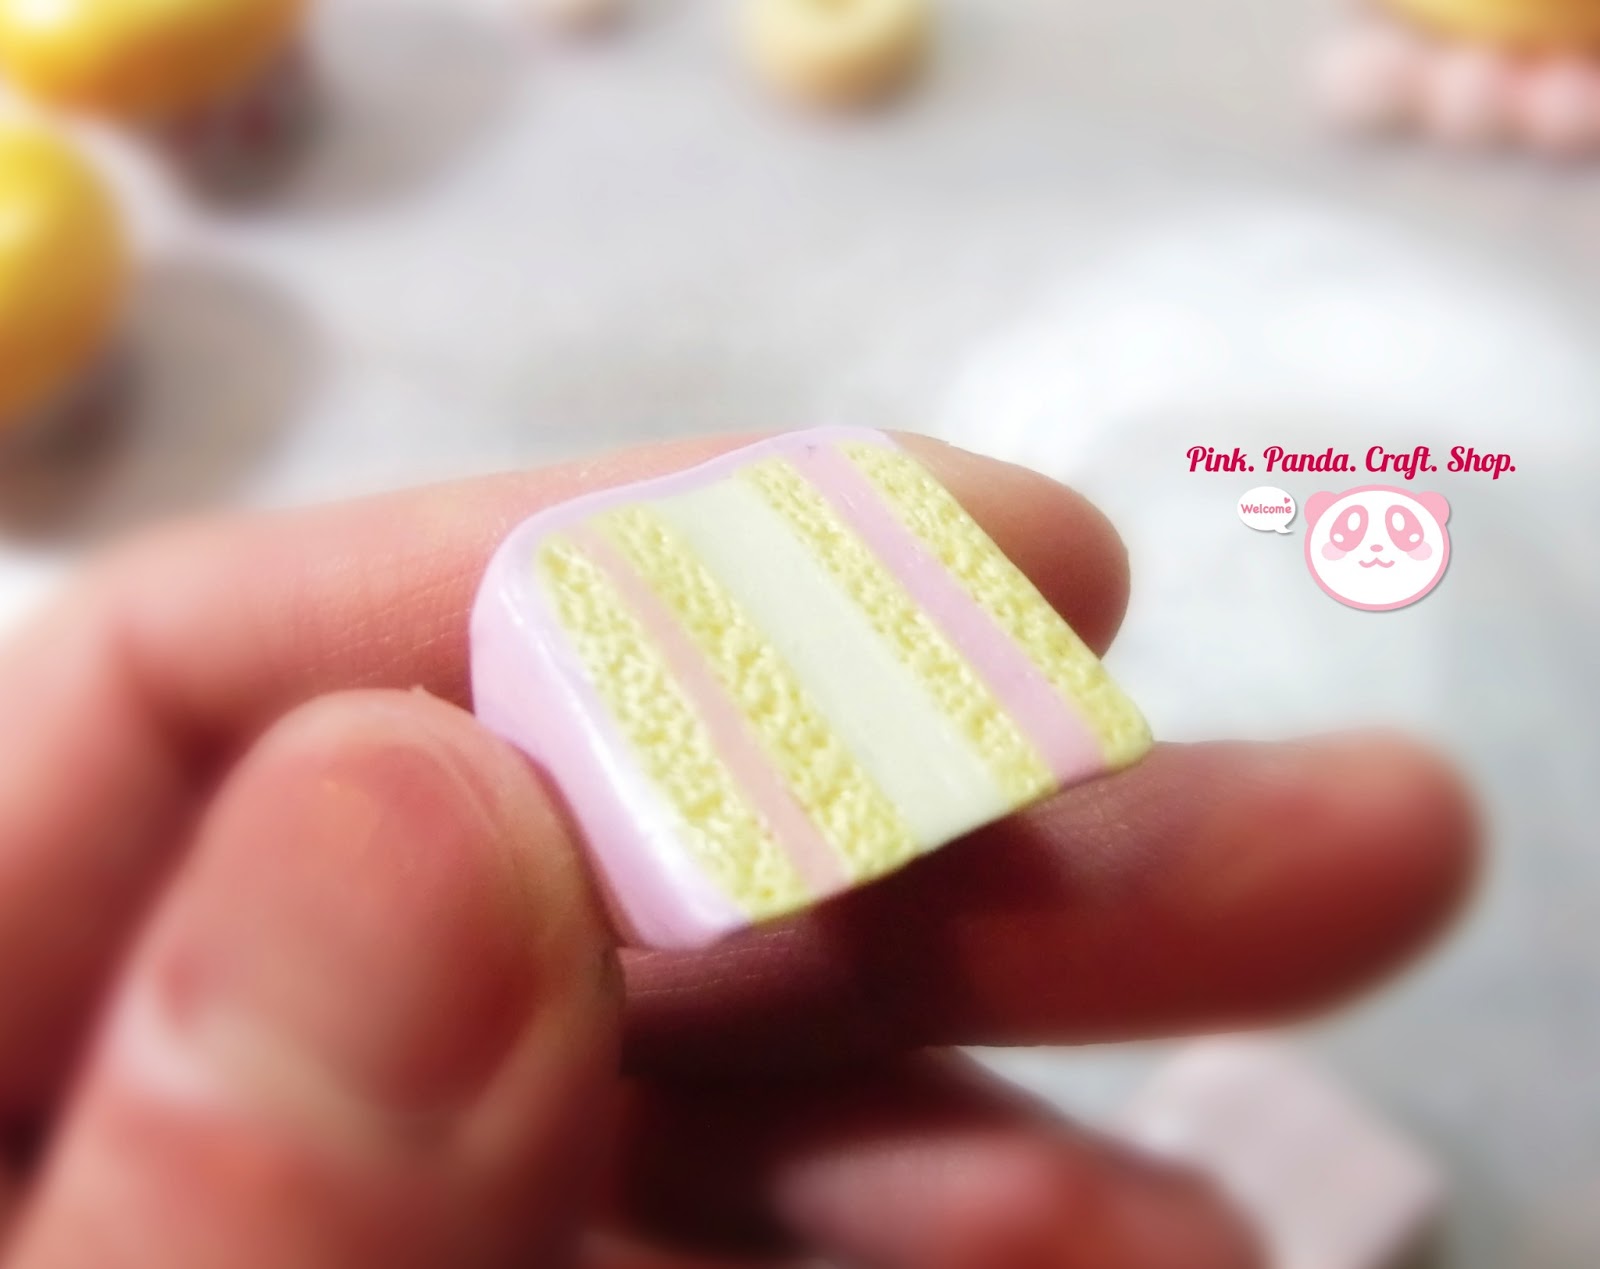
Hope you can see the finish on the polymer clay layered cake slices~ lol


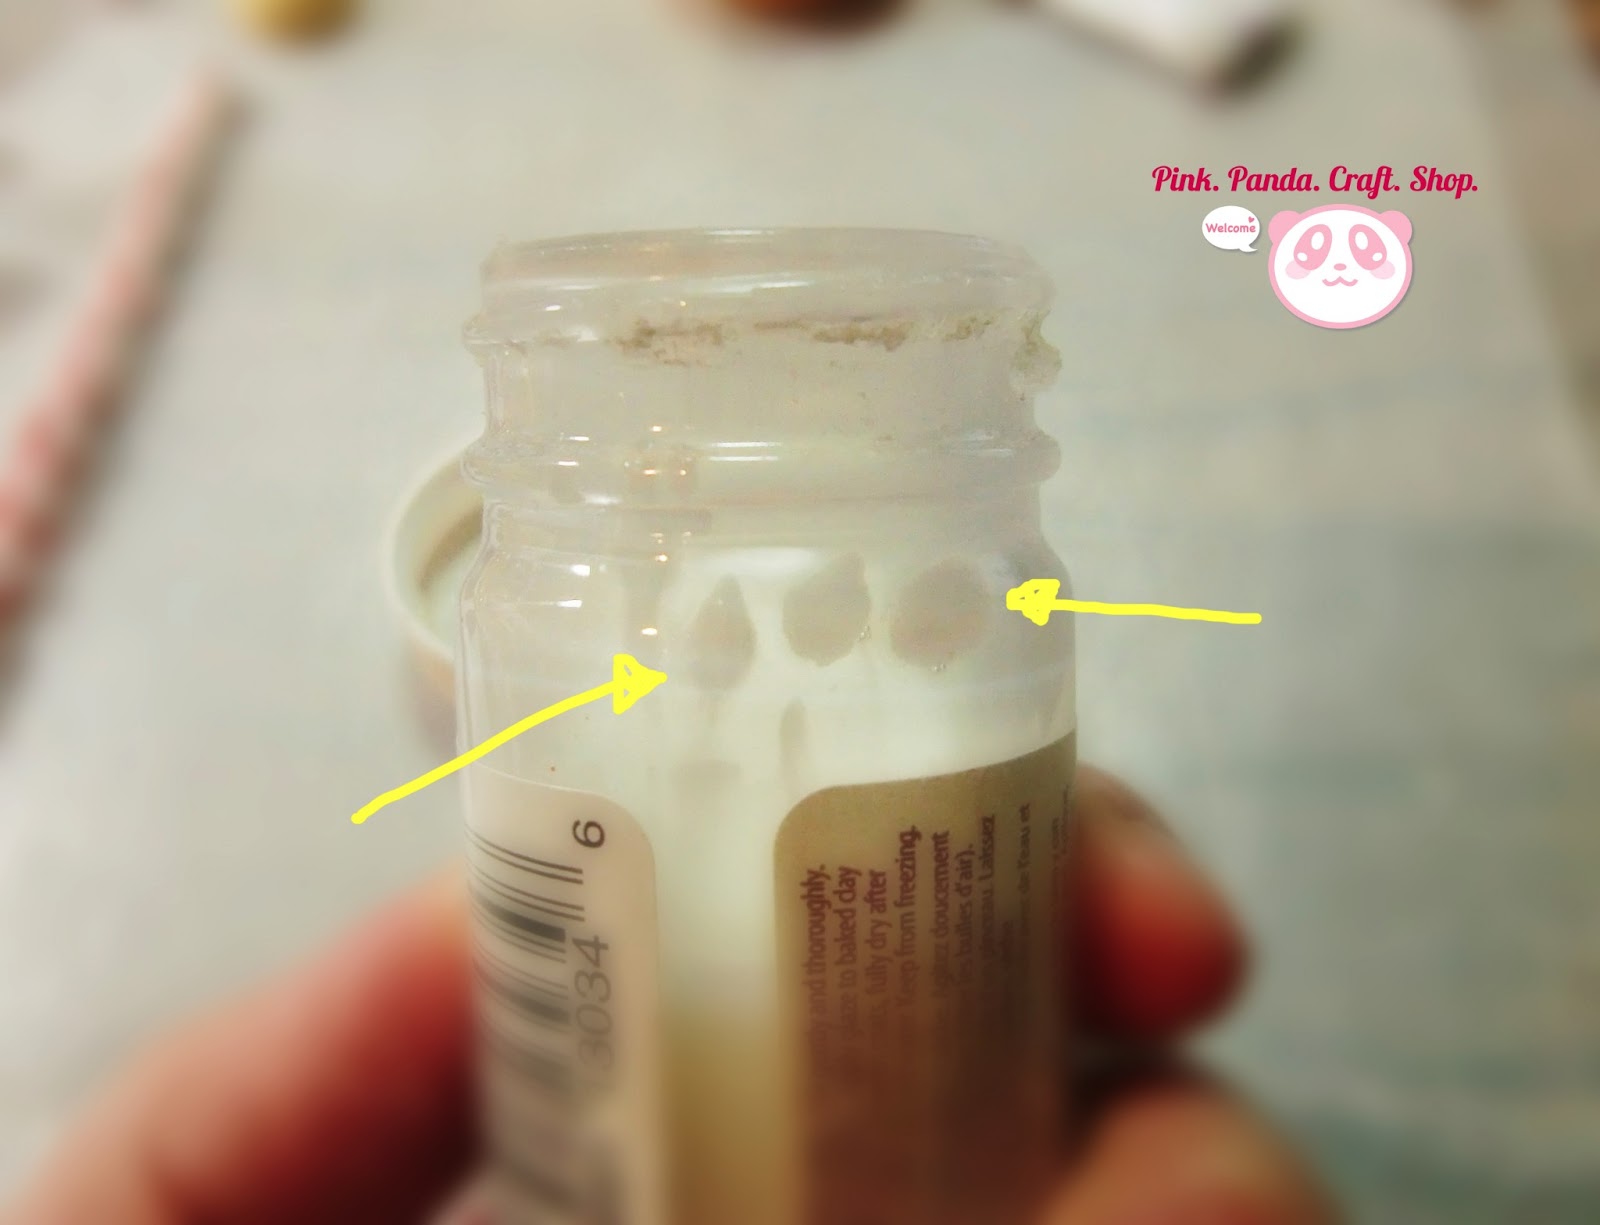
I've found there's some glaze chunks inside the top part of the bottle. I have no idea how this happened. I have the cap tightly closed, I don't know how it's formed in there. It's a good thing that I haven't found any chunks inside the glaze liquid. Oh well, it's not a big deal.
I hope you find this helpful to you if you're looking for some gloss to try. I know I haven't tried too many yet, but this is what I think about these so far. I'm not sponsored by any one of these brands and it's all my own opinions.
If you have found some gloss is really great and would suggest me to try, please let me know :) I like the Padico Sealer Super Gloss I have, but it's not convenient to get. I'm open to try some more different glosses~
If I find some more different ones, I'll post another review on our blog here :) So stay tuned~
Thank you for stopping by, if you like our blog, please subscribe~
Have a great weekend everyone!
Ki
PinkPandaCraftShop
Here's other pages we have:
PinkPandaCraftShop on Etsy:http://www.etsy.com/shop/pinkpandacraftshop
Please "LIKE" our Facebook fan page:
Please "FOLLOW" PinkPandaCraftShop on Twitter:
Please "FOLLOW" PinkPandaCraftShop on Pinterest:
Please "FOLLOW" PinkPandaCraftShop on Tumblr:
PinkPandaCraftShop email:
pinkpandacraftshop@gmail.com


