
Happy 2013 to everyone!
What a great year in 2012 and I hope the 2013 is even better :)
Ok today we're going to have a tutorial here.
This time we'll show you how to make polymer clay croissant. It's really simple and easy, let's get started!
Tools and materials you'll need:
-Polymer clay (A light yellow color)
-Clay roller
-Craft knife (I use X-acto knife)
-A blade for clay (http://www.joann.com/flexible-polyblade/prd36615/) or any other long blade will do
-Acrylic paint (Tan brown & Saffron yellow)
-Sponge
-Gloss
-Paint brush (For painting the gloss on)
Step 1,
prepare a light yellow color polymer clay

Step 2,
Roll the polymer clay out into a thin sheet, about 1.5mm thick.
(If the clay is a little sticky, you can put some flour on top so it wouldn't stick on the roller or the surface you work on)

Step 3,
use a long blade to help cutting out a triangular shape like the one in the picture.

Step 4,
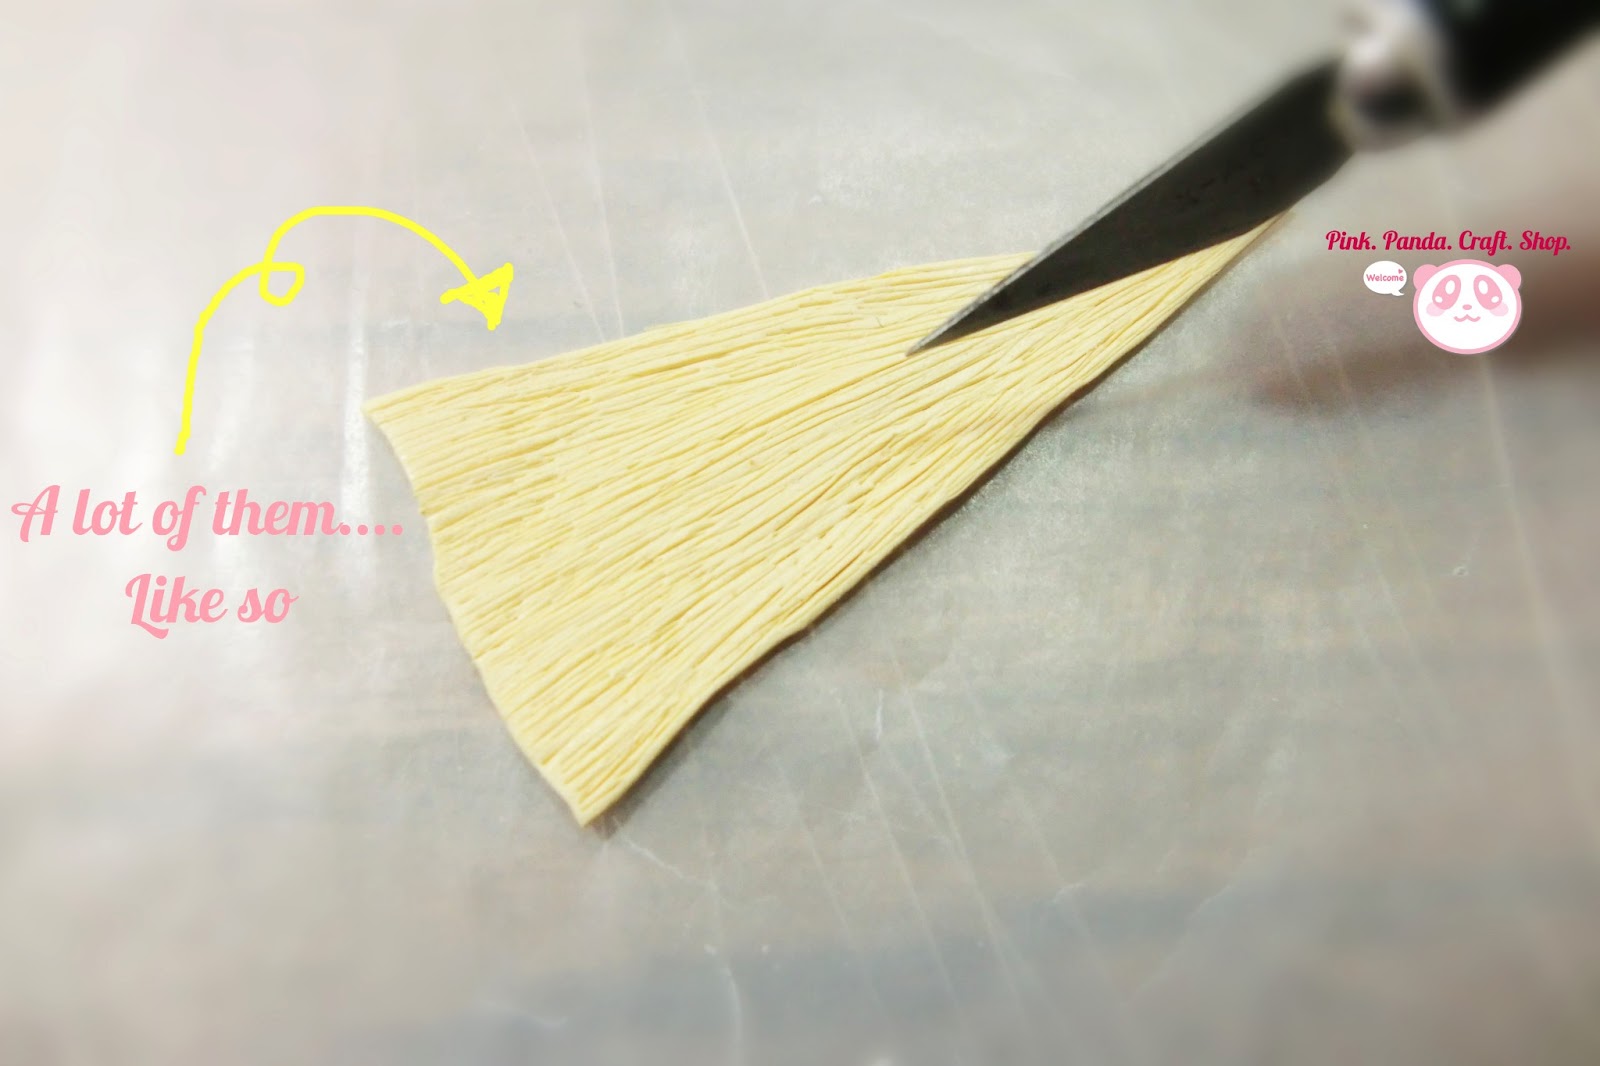
use the craft knife to lightly scratch some fine lines on ONE side of the triangle.

Keep scratching~
Make lots of fine lines all over it.
Step 5,
now, put the clean side up (no scratch lines)
Then start tight rolling up from the bottom of the triangle. (Just like making a real croissant~)

Keep rolling~
All the way to the top.

So now you have a shape like this~ (Starting to look like a croissant!)

use your fingers to gently squeeze the two ends towards each other.

You have a croissant~!
Step 7, bake this polymer clay croissant. (Make sure to follow to the instructions of the polymer clay you use)

Step 8, coloring.
Once the polymer clay croissant is baked, wait till is completely cool off.
Have your tan brown, saffron yellow acrylic paint and a sponge ready.

Use one side of the sponge to get some yellow first.

Remember to dap the excess off.

Step 9,
Stamp the saffron yellow color all over the entire polymer clay croissant.

After coloring, it should be like the one on the right in the picture~

Step 10,
use the other side of the sponge and dip some tan brown color.
(Make sure to get the excess off the sponge like previously)

Step 11,
this time you just gently push the tan brown on top of the saffron yellow. Don't push too hard, only let the brown color lightly goes on top and yet the yellow can be still peeking through.

The tan brown gives a golden baked color to it~

Last step,
when the acrylic paint is completely dried, put a couple layers of gloss on the polymer clay croissant. It can help blending the acrylic paints together and also can give a nice finished to it.
(Make sure one layer of the gloss is completely dried then put another layer on)

And there~ You have you're polymer clay baked cute croissant :)
Even beginner can start with this, it's really easy and fun to make!
Hope this tutorial can help you. We'd love to see your creations too! If you try this please share with us and tell us how you like it :)
Have a great one!
Ki
PinkPandaCraftShop
P.S.
Please subscribe to our blog if you like us :)
Here's other pages we have:
PinkPandaCraftShop on Etsy:http://www.etsy.com/shop/pinkpandacraftshop
Please "LIKE" our Facebook fan page:
Please "FOLLOW" PinkPandaCraftShop on Twitter:
Please "FOLLOW" PinkPandaCraftShop on Pinterest:
Please "FOLLOW" PinkPandaCraftShop on Tumblr:
PinkPandaCraftShop email:
pinkpandacraftshop@gmail.com


5 comments:
thanks for the tutorial!! love it!
You're welcome Lisa, we're glad that you love it and hope it's helpful to you :)
that is wondwrfull! good job
Thank you very much Ramona :) We'll have some more tutorials and reviews come up~
love this so much! Thanks for the amazing tutorial.
Post a Comment